Android App Links rely on a single JSON file hosted on your domain to prove that your app is authorized to handle URLs on that domain. That file is the Digital Asset Links file, hosted at /.well-known/assetlinks.json. Get it right, and Android routes matching URLs directly into your app. Get it wrong, and every matching link will show a disambiguation dialog instead.
This guide covers the complete setup: what the JSON format looks like, how to extract your SHA-256 certificate fingerprint, how to host the file correctly, how to support multiple apps or multiple signing certificates, and how to confirm that Android accepted your configuration.
What Digital Asset Links Actually Does
Digital Asset Links is a Google protocol that lets a website declare which Android apps (and which keys those apps are signed with) are authorized to act as verified handlers for URLs on that site.
When a user installs your app, Android reads the android:autoVerify="true" attribute in your intent filters, identifies each domain your app claims to handle, and fetches https://{domain}/.well-known/assetlinks.json for each one. It checks whether your app's package name and SHA-256 certificate fingerprint appear in that file with the right handle_all_urls relation. If they do, verification passes and your app becomes the default handler for those URLs.
For more context on how this fits into the full App Links picture, see the Tolinku App Links concepts documentation.
The assetlinks.json Format
The file is a JSON array. Each entry in the array is a "statement" that asserts a relationship between your site and a target. For App Links, the target is always an Android app.
Here is the minimal format for a single app:
[
  {
    "relation": ["delegate_permission/common.handle_all_urls"],
    "target": {
      "namespace": "android_app",
      "package_name": "com.example.myapp",
      "sha256_cert_fingerprints": [
        "AA:BB:CC:DD:EE:FF:00:11:22:33:44:55:66:77:88:99:AA:BB:CC:DD:EE:FF:00:11:22:33:44:55:66:77:88:99"
      ]
    }
  }
]
Key points about each field:
relation: Must be exactly["delegate_permission/common.handle_all_urls"]. This is the only relation type Android checks for App Links.namespace: Always"android_app"for Android apps.package_name: Your app's application ID, as declared in yourbuild.gradlefile. This is case-sensitive.sha256_cert_fingerprints: An array of SHA-256 fingerprints of the certificates used to sign your app. Each fingerprint is 32 bytes represented as 64 hex characters separated by colons (95 characters total including colons).
Getting Your SHA-256 Certificate Fingerprint
The fingerprint must match the certificate actually used to sign the APK or AAB that gets installed. If you use a different certificate for debug and release builds (which is standard practice), you need the fingerprint for each environment where you want verification to work.
From a keystore file
If you manage your own keystore, use the keytool command that ships with the Java JDK:
keytool -list -v -keystore /path/to/your/keystore.jks -alias your_key_alias
Enter your keystore password when prompted. The output will include a line like:
SHA256: AA:BB:CC:DD:EE:FF:...
That is the fingerprint you need.
From a signed APK
If you have a built APK but not the keystore file directly available, extract the certificate with apksigner:
apksigner verify --print-certs /path/to/your.apk
Look for the Signer #1 certificate SHA-256 digest line in the output.
From Google Play App Signing
If you use Google Play App Signing (which is now the default for new apps), Google re-signs your app with their own certificate. Your locally-generated signing key is no longer the key that gets installed on devices. In this case, you must get the fingerprint from the Google Play Console.
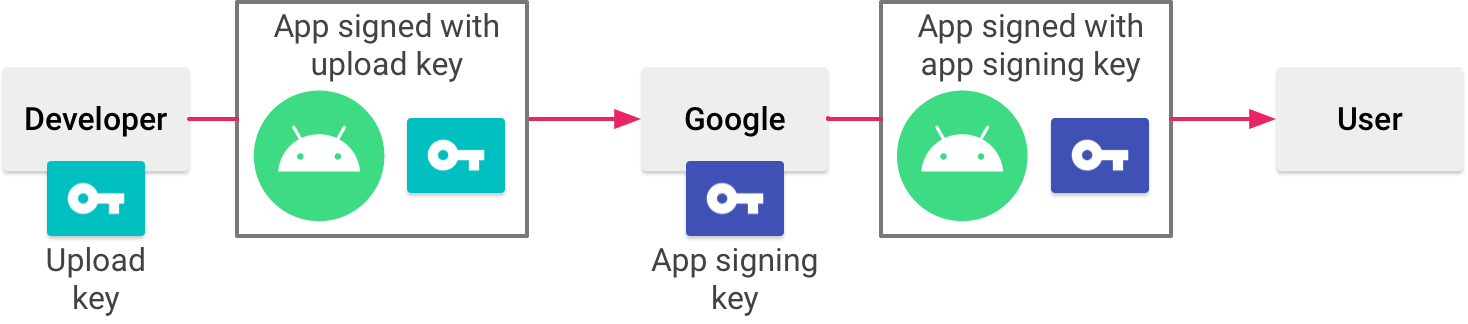
Source: Android Developer Documentation
Navigate to: Setup > App integrity > App signing tab. You will find the SHA-256 certificate fingerprint listed under "App signing key certificate." Copy that value directly.
This is one of the most common reasons App Links verification fails: developers use their local keystore fingerprint but distribute through Play App Signing, so the installed certificate never matches.
Debug fingerprint for development
For testing on debug builds, get the debug keystore fingerprint:
keytool -list -v -keystore ~/.android/debug.keystore -alias androiddebugkey -storepass android -keypass android
You can add both the debug and release fingerprints to the sha256_cert_fingerprints array so the same assetlinks.json file works for both.
Hosting the File Correctly
The file must be accessible at exactly this path:
https://{your-domain}/.well-known/assetlinks.json
Several hosting requirements are non-negotiable:
HTTPS only. Android will not fetch the file over plain HTTP. Your domain must have a valid TLS certificate.
No redirects. If /.well-known/assetlinks.json redirects to another URL (even another HTTPS URL), Android will not follow the redirect. The file must be served directly at that exact path.
Correct Content-Type. The response must include Content-Type: application/json. Some static hosting providers serve unknown files with text/plain or application/octet-stream. Verify the response headers.
No authentication. The file must be publicly accessible without cookies, tokens, or any authentication headers.
Accessible from Android's servers. For Android 12 and later, Google's servers pre-fetch and cache the file rather than having each device fetch it at install time. This means the file needs to be reachable from Google's infrastructure, not just from within your own network.
Nginx configuration
If you are hosting with Nginx and need to set the correct Content-Type for the .well-known directory:
location /.well-known/assetlinks.json {
    default_type application/json;
    add_header Cache-Control "max-age=300";
}
Apache configuration
For Apache, add a MIME type mapping in your .htaccess or server config:
<Files "assetlinks.json">
    Header set Content-Type "application/json"
</Files>
Supporting Multiple Apps
If multiple apps should handle the same domain (for example, a main app and a beta or debug variant with a different package name), include a statement for each app in the array:
[
  {
    "relation": ["delegate_permission/common.handle_all_urls"],
    "target": {
      "namespace": "android_app",
      "package_name": "com.example.myapp",
      "sha256_cert_fingerprints": [
        "AA:BB:CC:DD:..."
      ]
    }
  },
  {
    "relation": ["delegate_permission/common.handle_all_urls"],
    "target": {
      "namespace": "android_app",
      "package_name": "com.example.myapp.beta",
      "sha256_cert_fingerprints": [
        "11:22:33:44:..."
      ]
    }
  }
]
Each app entry is independent. A domain can authorize any number of apps simultaneously.
Supporting Multiple Signing Certificates
It is valid to list multiple fingerprints in sha256_cert_fingerprints for a single app. Android considers verification successful if the installed certificate matches any fingerprint in the array. This is useful when:
- You want to support both debug and release builds from the same domain.
- You are rotating signing keys and need both the old and new keys to work during the transition.
- Your CI pipeline uses a different signing certificate than your production releases.
"sha256_cert_fingerprints": [
  "AA:BB:CC:DD:...",
  "11:22:33:44:..."
]
Verifying the Setup
After hosting the file, verify it before testing on a device. The Google Digital Asset Links API provides a direct verification endpoint:
https://digitalassetlinks.googleapis.com/v1/statements:list?source.web.site=https://yourdomain.com&relation=delegate_permission/common.handle_all_urls
Open that URL in a browser (substituting your actual domain). If the file is valid and accessible, the API returns a response with "complete": true and lists the statements it found. If the file has a problem, the response will include an error description.
The Statement List tool in the Google developer documentation also provides a form-based interface for checking your file.
Checking verification status on a device
After installing your app on a device, check whether Android accepted the verification:
adb shell pm get-app-links --package com.example.myapp
The output shows each domain and its verification status. You want to see verified for each domain. If you see none or rejected, the file either has an error or the server configuration is blocking Android from fetching it.
For a full walkthrough of testing commands and common verification failures, see Testing Android App Links and the Tolinku Android troubleshooting guide.
Common Mistakes
Wrong package name. The package_name in the JSON must match the applicationId in your app's build.gradle, not the Java package name. These are often different in larger projects.
Missing the relation array format. The relation field must be an array, even though it contains only one string. "relation": "delegate_permission/common.handle_all_urls" (without brackets) is invalid JSON for this spec and will fail.
Stale cache during testing. Android and Google's servers cache the assetlinks.json file. After making changes, it can take several minutes to an hour for the new version to propagate. When debugging, use adb to trigger a manual re-verification rather than reinstalling repeatedly.
HTTP instead of HTTPS. Even if your site normally redirects HTTP to HTTPS, the assetlinks.json must be served at the HTTPS URL directly.
File served from a subdomain. If your app intent filter lists example.com as the host, the file must be at https://example.com/.well-known/assetlinks.json. A file at https://www.example.com/.well-known/assetlinks.json does not apply to example.com. You need separate files (or the same content) at each subdomain your app handles.
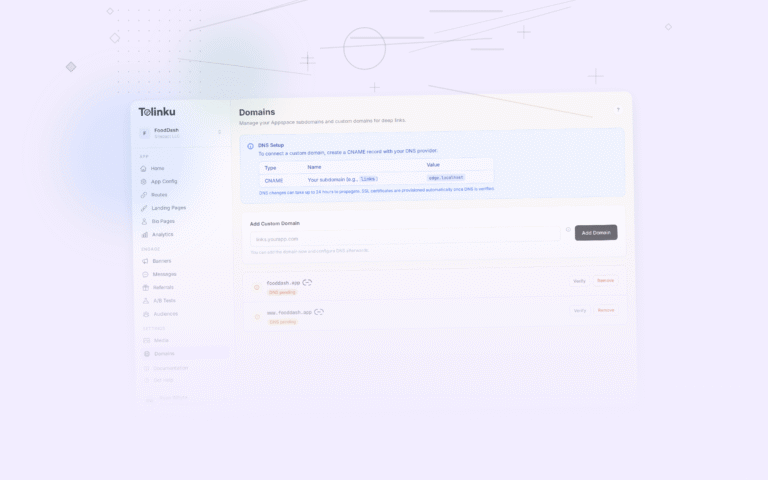
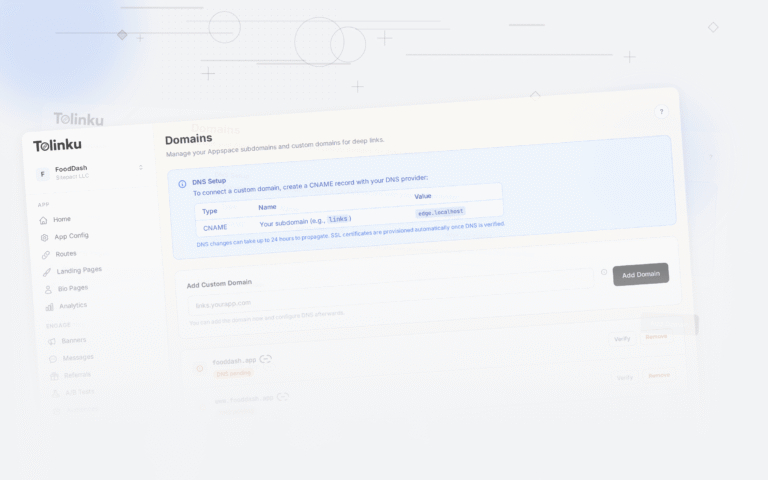
Using Tolinku for Managed App Links
If you are using Tolinku to manage your deep links, the platform handles the assetlinks.json file automatically. You configure your package name and certificate fingerprint in the Appspace settings, and Tolinku serves the correct file from your domain. See the Tolinku Android configuration guide for the setup steps.
This removes the hosting complexity and ensures the file stays in sync as you add new apps or update signing certificates, without manual file editing.
Summary
The assetlinks.json file is small but precise. The format is straightforward, but the hosting requirements are strict: HTTPS, no redirects, correct Content-Type, and public access. The most common point of failure is a certificate fingerprint mismatch, usually because of Google Play App Signing. Get the fingerprint from the Play Console rather than your local keystore if you distribute through Google Play, add both debug and release fingerprints during development, and use the Digital Asset Links API to validate the file before testing on devices.
Get deep linking tips in your inbox
One email per week. No spam.