Shipping a webhook integration without testing it is like deploying an API without calling it first. You won't know if your receiver handles edge cases, if your signature verification works, or if your downstream logic processes the payload correctly until a real event arrives, and by then it's too late.
This guide covers the tools and techniques for testing Tolinku webhook integrations before they reach production. For the initial setup, see the webhook setup guide. For debugging issues in production, see the webhook debugging guide.
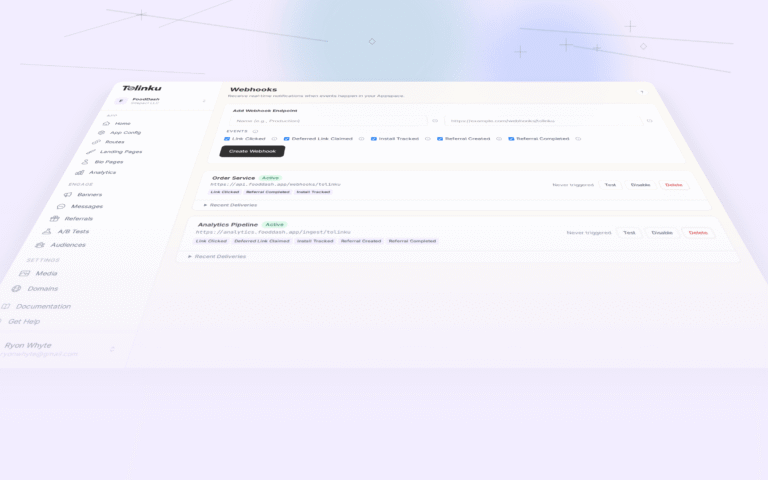
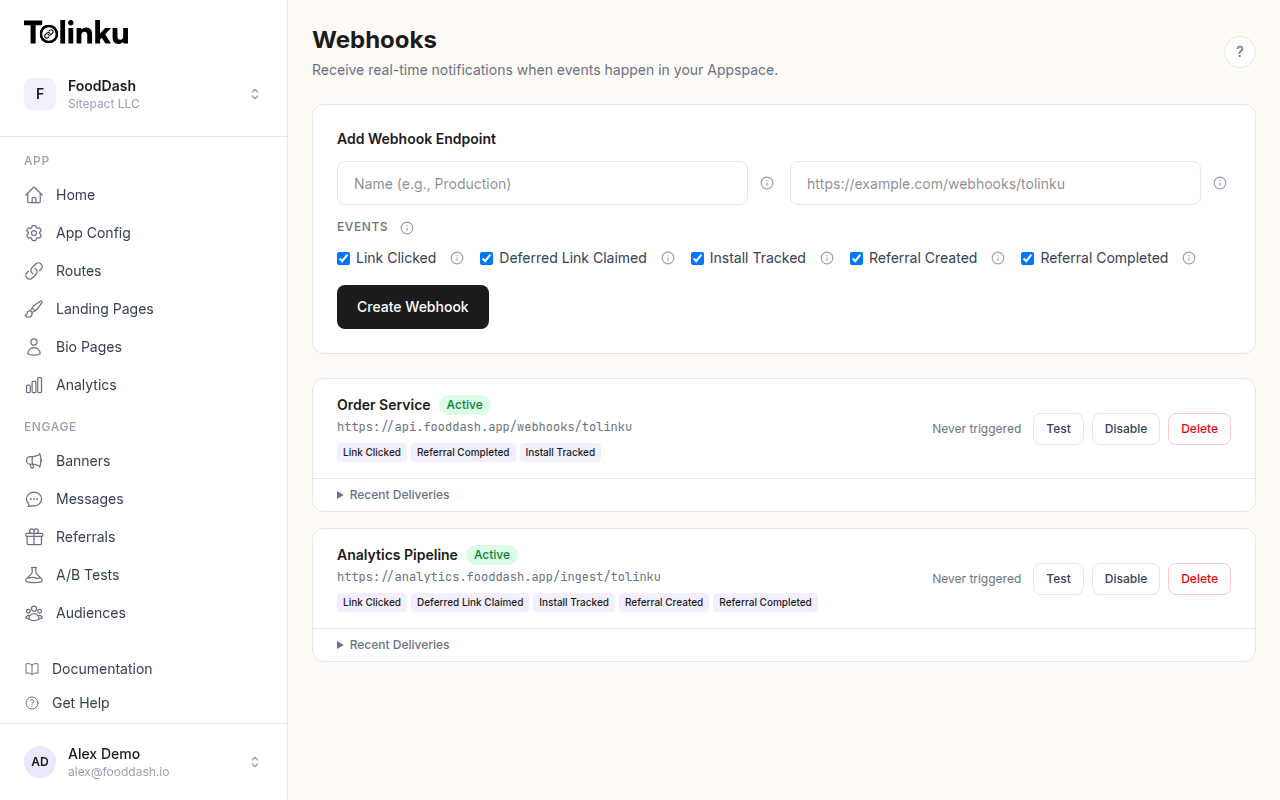 The webhooks page with create form, webhook list, and delivery log.
The Testing Workflow
A thorough webhook testing workflow has four stages:
- Inspect: See what the webhook payload looks like before writing any code
- Receive: Confirm your endpoint can accept and parse the payload
- Verify: Ensure signature verification works correctly
- Simulate: Test your complete pipeline with realistic event sequences
Stage 1: Inspect the Payload
Before writing handler code, see what the actual payload looks like. These tools let you receive and inspect webhook payloads without deploying anything.
webhook.site
webhook.site generates a unique URL that captures incoming HTTP requests. Point your Tolinku webhook at this URL, send a test event, and inspect the full request: headers, body, method, and timing.
How to use it:
- Open webhook.site. It generates a unique URL (e.g.,
https://webhook.site/abc-123-def) - In your Tolinku Appspace, create a webhook pointing to that URL
- Click the Test button on your webhook in the dashboard
- Go back to webhook.site and inspect the captured request
You'll see:
- Headers:
X-Webhook-Signature,X-Webhook-Event,Content-Type,User-Agent: Tolinku/1.0 - Body: The JSON payload with
event,timestamp, anddatafields
This is the fastest way to understand the payload structure before writing any code. The free tier captures up to 500 requests per URL.
RequestBin (Pipedream)
Pipedream's RequestBin works similarly to webhook.site but adds workflow capabilities. You can:
- Inspect the raw request
- Add code steps to transform the payload
- Forward the event to other services
It's useful when you want to prototype the transformation logic before building a dedicated receiver.
Beeceptor
Beeceptor creates mock API endpoints that can return custom responses. Beyond inspection, you can:
- Set custom response status codes (test how Tolinku handles 500 errors)
- Add response delays (test timeout behavior)
- Define rules to return different responses based on request content
This is particularly useful for testing how Tolinku's retry logic behaves when your endpoint returns errors. Tolinku retries on non-2xx responses with delays of 1 minute, 5 minutes, and 30 minutes.
Stage 2: Receive Locally
Once you know what the payload looks like, build your receiver locally and test it with real webhook events. The challenge: your local machine isn't publicly accessible. These tools solve that.
ngrok
ngrok creates a public tunnel to your local server. It's the most widely used tool for local webhook development.
# Start your local receiver on port 3000
npm run dev

# In another terminal, create a tunnel
ngrok http 3000
ngrok outputs a public URL (e.g., https://abc123.ngrok-free.app). Use this URL as your Tolinku webhook endpoint.
ngrok's inspection dashboard (http://127.0.0.1:4040) shows every request in real time: headers, body, response status, and timing. You can replay requests by clicking "Replay" in the dashboard, which is invaluable for debugging without retriggering the actual event.
Cloudflare Tunnel
Cloudflare Tunnel (formerly Argo Tunnel) provides a similar capability but through Cloudflare's network. It's free and doesn't require an account for quick testing:
# Quick tunnel (no account needed)
cloudflared tunnel --url http://localhost:3000
localtunnel
localtunnel is a simpler, open-source alternative:
npx localtunnel --port 3000
It generates a URL like https://quiet-fox-42.loca.lt. It's less reliable than ngrok for long-running sessions but works well for quick tests.
Stage 3: Verify Signatures
Signature verification is the most common source of bugs in webhook integrations. Test it explicitly.
Write a Signature Test
Create a standalone test that verifies your signature logic against a known payload and secret:
import crypto from 'crypto';
import { describe, it, expect } from 'vitest';

describe('webhook signature verification', () => {
  const secret = 'whsec_testsecret123456789012345678901234';

  it('should verify a valid signature', () => {
    const payload = JSON.stringify({
      event: 'link.clicked',
      timestamp: '2026-05-21T10:00:00.000Z',
      data: {
        prefix: 'go',
        token: 'test-link',
        hostname: 'links.example.com',
        ip: '203.0.113.1',
        platform: 'ios',
        device_type: 'mobile',
        campaign: 'test-campaign',
      },
    });

    const signature = crypto
      .createHmac('sha256', secret)
      .update(payload)
      .digest('hex');

    // Your verification function
    const isValid = verifySignature(payload, signature, secret);
    expect(isValid).toBe(true);
  });

  it('should reject a tampered payload', () => {
    const payload = '{"event":"link.clicked","tampered":true}';
    const wrongSignature = 'deadbeef1234567890';

    const isValid = verifySignature(payload, wrongSignature, secret);
    expect(isValid).toBe(false);
  });

  it('should reject an empty signature', () => {
    const payload = '{"event":"link.clicked"}';
    const isValid = verifySignature(payload, '', secret);
    expect(isValid).toBe(false);
  });
});

function verifySignature(
  body: string,
  signature: string,
  secret: string
): boolean {
  if (!signature) return false;
  const expected = crypto
    .createHmac('sha256', secret)
    .update(body)
    .digest('hex');
  return crypto.timingSafeEqual(
    Buffer.from(signature),
    Buffer.from(expected)
  );
}
Common Signature Pitfalls
- Parsing before verifying. If you parse the JSON body before computing the signature, you might compute the signature on a re-serialized version that differs from the original. Always verify against the raw bytes.
- Using
express.json()middleware. This parses the body before your handler runs. Useexpress.raw({ type: 'application/json' })on your webhook route so you receive the raw Buffer. - String encoding. The signature is computed on the raw bytes sent over the wire. Make sure you're not accidentally converting encodings.
See the webhook security guide for a full treatment of signature verification.
Stage 4: Simulate Event Sequences
Real webhook traffic isn't a single event. It's a sequence: a click, then a deferred link claim, then an install, then maybe a referral completion. Your handler should process these in order and handle out-of-order delivery gracefully.
Build a Webhook Simulator
Create a script that sends a realistic sequence of events to your receiver:
import crypto from 'crypto';

const RECEIVER_URL = process.env.RECEIVER_URL || 'http://localhost:3000/webhooks/tolinku';
const SECRET = process.env.WEBHOOK_SECRET || 'whsec_testsecret123456789012345678901234';

async function sendEvent(event: any) {
  const body = JSON.stringify(event);
  const signature = crypto
    .createHmac('sha256', SECRET)
    .update(body)
    .digest('hex');

  const response = await fetch(RECEIVER_URL, {
    method: 'POST',
    headers: {
      'Content-Type': 'application/json',
      'X-Webhook-Signature': signature,
      'X-Webhook-Event': event.event,
      'User-Agent': 'Tolinku/1.0',
    },
    body,
  });

  console.log(`${event.event}: ${response.status}`);
}

async function simulateUserJourney() {
  const now = new Date();

  // Step 1: User clicks a campaign link
  await sendEvent({
    event: 'link.clicked',
    timestamp: now.toISOString(),
    data: {
      prefix: 'go',
      token: 'summer-promo',
      hostname: 'links.example.com',
      ip: '203.0.113.42',
      platform: 'ios',
      device_type: 'mobile',
      campaign: 'email-newsletter-may',
    },
  });

  // Step 2: User installs the app (30 seconds later)
  await sendEvent({
    event: 'deferred_link.claimed',
    timestamp: new Date(now.getTime() + 30000).toISOString(),
    data: {
      prefix: 'go',
      token: 'summer-promo',
      platform: 'ios',
    },
  });

  // Step 3: Install is tracked
  await sendEvent({
    event: 'install.tracked',
    timestamp: new Date(now.getTime() + 31000).toISOString(),
    data: {
      prefix: 'go',
      token: 'summer-promo',
      platform: 'ios',
      campaign: 'email-newsletter-may',
    },
  });

  console.log('Simulation complete: 3 events sent');
}

simulateUserJourney();
Run this against your local receiver to validate the full event sequence.
Test Edge Cases
Use the simulator to test scenarios that are hard to trigger manually:
- Out-of-order delivery: Send
install.trackedbeforelink.clicked. Does your handler cope? - Duplicate events: Send the same event twice. Does your deduplication work?
- Missing fields: Send an event with
data.campaignset tonull. Does your handler crash or handle it gracefully? - Invalid signature: Send an event with a wrong signature. Does your receiver reject it with 401?
- Large payloads: Send events with very long token or campaign strings to test your database column sizes.
Tolinku's Built-In Test Feature
The Tolinku dashboard includes a Test button on each webhook endpoint. This sends a test payload with:
{
  "event": "test",
  "timestamp": "2026-05-21T10:00:00.000Z",
  "data": {
    "message": "This is a test webhook from Tolinku.",
    "webhook_id": "wh_abc123",
    "appspace_id": "as_xyz789"
  }
}
The test event uses the same signing mechanism as production events, so it validates that your endpoint is reachable and your signature verification works. The dashboard shows the response status code and whether the delivery succeeded.
For full payload testing, trigger real events by clicking your actual deep links. Each click generates a link.clicked webhook within seconds.
Monitoring Deliveries
After deploying your webhook receiver, check the delivery logs in the Tolinku dashboard. Each webhook endpoint shows:
- Last triggered at: When the most recent event was sent
- Last status code: The HTTP response your endpoint returned
- Recent deliveries: A log of the last 50 deliveries with status codes, response times, and any error messages
If you see failed deliveries, check:
- Is your endpoint returning 200 for successful requests?
- Is the response within 10 seconds? (Tolinku times out after 10 seconds)
- Is your SSL certificate valid? (Tolinku only delivers to HTTPS endpoints in production)
CI/CD Integration
Add webhook handler tests to your CI pipeline. The unit tests for signature verification and payload processing should run on every commit. The integration test (simulator against a running receiver) can run as part of your staging deployment.
# Example GitHub Actions step
- name: Test webhook handler
  run: |
    npm run test -- --filter webhook

- name: Integration test
  run: |
    npm run dev &
    sleep 3
    npx tsx scripts/webhook-simulator.ts
Tool Summary
| Tool | Best For | Cost |
|---|---|---|
| webhook.site | Quick payload inspection | Free (500 req) |
| Pipedream RequestBin | Inspection + prototyping | Free tier |
| Beeceptor | Custom response testing | Free tier |
| ngrok | Local development tunneling | Free (1 tunnel) |
| Cloudflare Tunnel | Local tunneling via Cloudflare | Free |
| localtunnel | Quick local tunneling | Free (open source) |
| Custom simulator | End-to-end integration testing | DIY |
| Tolinku Test button | Quick connectivity + signature check | Built-in |
Start with webhook.site to inspect the payload, then set up ngrok for local development, write signature verification tests, and build a simulator for integration testing. Once you're confident everything works, deploy to staging and validate with real events before going to production.
For more on testing webhook integrations, see the webhook debugging guide and the webhook security guide.
Get deep linking tips in your inbox
One email per week. No spam.