Smart banners are most effective when they are timed to match your marketing campaigns. A banner promoting your Black Friday sale should appear on November 28, not November 15. A banner for a product launch should go live when the product is available, not a week early. And a seasonal campaign banner should disappear automatically when the campaign ends, not linger until someone remembers to remove it.
Banner scheduling lets you set start dates, end dates, and time-based rules so banners appear and disappear automatically. This guide covers scheduling patterns, campaign coordination, and implementation approaches. For the smart banner setup, see Tolinku's smart banner feature. For the complete smart banners guide, see the smart banners overview.
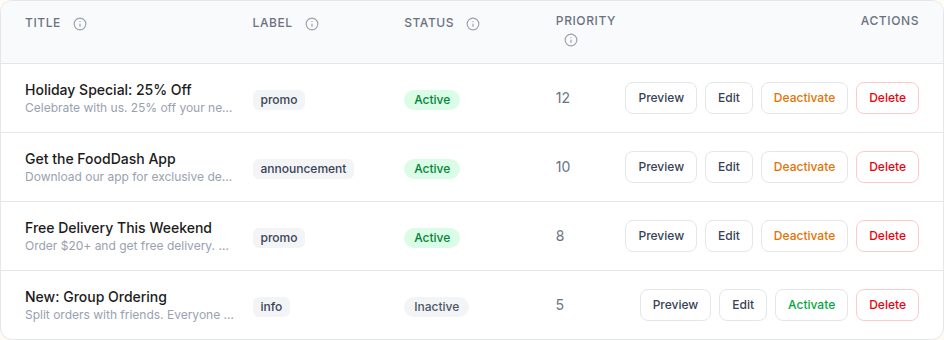 The smart banners list showing banner titles, status toggles, segments, and action buttons.
Why Schedule Banners
Campaign Alignment
Your website traffic peaks at different times depending on the campaign:
- Product launches: Traffic spikes on launch day. The banner should be live and ready.
- Sales and promotions: The banner should match the sale period exactly. Showing a "20% off" banner after the sale ends erodes trust.
- Seasonal campaigns: Holiday promotions, back-to-school, summer sales. Banners rotate with the season.
- Event-driven: Conference announcements, sports events, live streams. Banners are relevant for a short window.
Avoiding Banner Fatigue
If the same banner runs indefinitely, users stop noticing it. Scheduled rotation keeps the messaging fresh:
Week 1: "New: Try our mobile app for faster checkout"
Week 2: "Summer sale: 30% off in the app"
Week 3: "Rate us 5 stars and get free shipping"
Week 4: Rotate back to Week 1 or pause
Reducing Manual Work
Without scheduling, someone has to remember to enable the banner at the right time and disable it when the campaign ends. Scheduling automates this, reducing the risk of stale banners and last-minute scrambles.
Scheduling Patterns
Pattern 1: Fixed Start and End Dates
The simplest pattern. The banner appears on a specific date and disappears on another:
const bannerConfig = {
  message: "Summer Sale: 30% off everything in the app!",
  schedule: {
    startDate: "2026-06-15T00:00:00Z",
    endDate: "2026-07-15T23:59:59Z",
  },
  cta: "Shop Now",
  deepLink: "/sale/summer-2026",
};
Use cases: seasonal sales, limited-time promotions, event tie-ins.
Pattern 2: Recurring Schedule
The banner appears at specific times on a recurring basis:
const bannerConfig = {
  message: "Happy Hour: Free delivery in the app, 4-6pm daily!",
  schedule: {
    recurring: true,
    days: ["monday", "tuesday", "wednesday", "thursday", "friday"],
    startTime: "16:00",
    endTime: "18:00",
    timezone: "America/New_York",
  },
  cta: "Order Now",
  deepLink: "/menu",
};
Use cases: daily promotions (lunch specials, happy hours), weekend-only banners, weekday commuter offers.
Pattern 3: Launch Countdown
Show a countdown banner before a product launch, then switch to the launch banner:
// Phase 1: Countdown banner (shows until launch)
const countdownBanner = {
  message: "New product drops in {countdown}!",
  schedule: {
    startDate: "2026-06-01T00:00:00Z",
    endDate: "2026-06-15T09:00:00Z",  // Ends when launch banner starts
  },
  cta: "Get Notified",
  deepLink: "/products/upcoming",
};

// Phase 2: Launch banner (shows after launch)
const launchBanner = {
  message: "It's here! Shop the new collection in our app.",
  schedule: {
    startDate: "2026-06-15T09:00:00Z",
    endDate: "2026-06-30T23:59:59Z",
  },
  cta: "Shop Now",
  deepLink: "/products/new-collection",
};
Pattern 4: A/B Test Schedule
Run different banners for different time periods to test messaging:
const variants = [
  {
    id: "variant-a",
    message: "Get the app for exclusive deals",
    schedule: { startDate: "2026-06-01", endDate: "2026-06-08" },
  },
  {
    id: "variant-b",
    message: "Shop faster with our mobile app",
    schedule: { startDate: "2026-06-08", endDate: "2026-06-15" },
  },
];
Compare click-through rates and install rates between the time periods.
Implementation Approaches
Client-Side Scheduling
The banner script checks the current time against the schedule before rendering:
function shouldShowBanner(config) {
  const now = new Date();

  if (config.schedule) {
    const { startDate, endDate, recurring, days, startTime, endTime, timezone } = config.schedule;

    // Fixed date range
    if (startDate && new Date(startDate) > now) return false;
    if (endDate && new Date(endDate) < now) return false;

    // Recurring schedule
    if (recurring) {
      const localTime = now.toLocaleString('en-US', { timeZone: timezone });
      const localDate = new Date(localTime);
      const dayName = localDate.toLocaleDateString('en-US', { weekday: 'long' }).toLowerCase();

      if (days && !days.includes(dayName)) return false;

      const currentTime = localDate.toTimeString().slice(0, 5); // "HH:MM"
      if (startTime && currentTime < startTime) return false;
      if (endTime && currentTime > endTime) return false;
    }
  }

  return true;
}
Pros: No server calls needed. Works with static configuration. Cons: Clock-dependent (user's device clock may be wrong). Configuration changes require a code deploy.
Server-Side Scheduling
The server decides which banner to serve based on the current time:
// API endpoint: GET /api/banners/active
app.get('/api/banners/active', (req, res) => {
  const now = new Date();
  const activeBanners = banners.filter(b => {
    if (b.schedule.startDate && new Date(b.schedule.startDate) > now) return false;
    if (b.schedule.endDate && new Date(b.schedule.endDate) < now) return false;
    return true;
  });

  // Return the highest-priority active banner
  const banner = activeBanners.sort((a, b) => b.priority - a.priority)[0];
  res.json(banner || null);
});
Pros: Centralized control. No code deploy needed to change schedules. Server clock is authoritative. Cons: Requires an API call on each page load (mitigated with caching).
Dashboard-Based Scheduling
Most smart banner platforms provide a UI for scheduling:
- Create the banner content and design.
- Set the start date and time.
- Set the end date and time (optional; leave blank for indefinite).
- Set targeting rules (which pages, which users).
- Publish. The banner appears and disappears automatically.
This is the approach used by Tolinku's smart banners. No code changes needed for scheduling; everything is configured in the dashboard.
Campaign Coordination
Aligning with Email Campaigns
When you send a promotional email, schedule the smart banner to go live at the same time. The email drives traffic to your website; the banner converts that traffic to app installs:
Email sends: June 15, 9:00 AM
Banner starts: June 15, 8:55 AM (5 minutes buffer)
Banner message matches email subject: "Summer Sale: 30% off"
Banner deep link: /sale/summer-2026 (same destination as email CTA)
Aligning with Paid Ads
If you are running paid ads that drive traffic to your website (not directly to the app store), the smart banner captures users who are already on your site:
Ad campaign: June 1-30
Landing page: yourapp.com/summer-sale
Smart banner on that page: "Get 30% off in the app" (scheduled June 1-30)
Banner deep link: /sale/summer-2026
The ad drives the traffic; the banner converts it to app installs with deferred deep linking.
Multi-Banner Campaigns
For campaigns with multiple phases:
Phase 1 (Teaser): June 1-14
  Banner: "Something big is coming June 15"

Phase 2 (Launch): June 15-30
  Banner: "Summer Sale is live! 30% off in the app"

Phase 3 (Last Chance): July 1-7
  Banner: "Last chance: Summer Sale ends July 7"
Each phase has a different banner with different messaging, all scheduled in advance.
Timezone Handling
Scheduling across timezones requires care:
- Global campaigns: Schedule in UTC. The banner goes live at the same moment worldwide.
- Regional campaigns: Schedule in the target timezone. A US-focused sale should start at midnight EST, not midnight UTC.
- User-local scheduling: Use the visitor's detected timezone to show the banner at the right local time. This requires client-side scheduling or server-side timezone detection.
// Client-side: check against user's local time
function isWithinSchedule(startTime, endTime) {
  const now = new Date();
  const hours = now.getHours();
  const minutes = now.getMinutes();
  const currentTime = `${hours.toString().padStart(2, '0')}:${minutes.toString().padStart(2, '0')}`;
  return currentTime >= startTime && currentTime <= endTime;
}
Tolinku Banner Scheduling
Tolinku's smart banners support scheduling through the dashboard. Set start and end dates for each banner, configure targeting rules, and the banner appears and disappears automatically. No code changes needed.
For banner display behavior, see banner dismiss behavior. For the complete smart banners setup, see the smart banners guide. For banner targeting and scheduling configuration, see the Tolinku documentation.
Get deep linking tips in your inbox
One email per week. No spam.