Most analytics setups for deep links rely on periodic exports or manual CSV pulls. You run a query, download the results, load them into your warehouse, and by the time the data is ready, the campaign you wanted to optimize has already burned through half its budget. Webhooks eliminate that delay by pushing events to your pipeline the moment they happen.
This guide covers how to connect Tolinku webhooks to the most common analytics destinations: data warehouses (BigQuery, Snowflake), product analytics tools (Amplitude, Mixpanel), and customer data platforms (Segment). Each integration follows the same pattern: receive the webhook, transform the payload, and forward it to the destination.
If you haven't set up webhooks yet, start with the webhook setup guide.
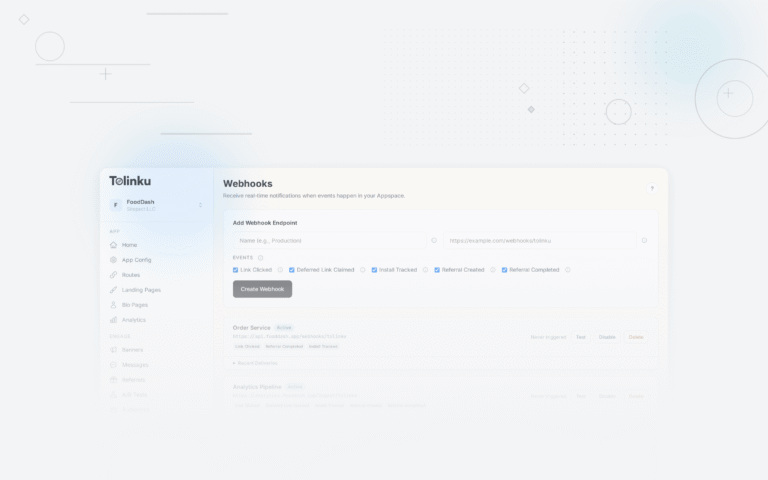
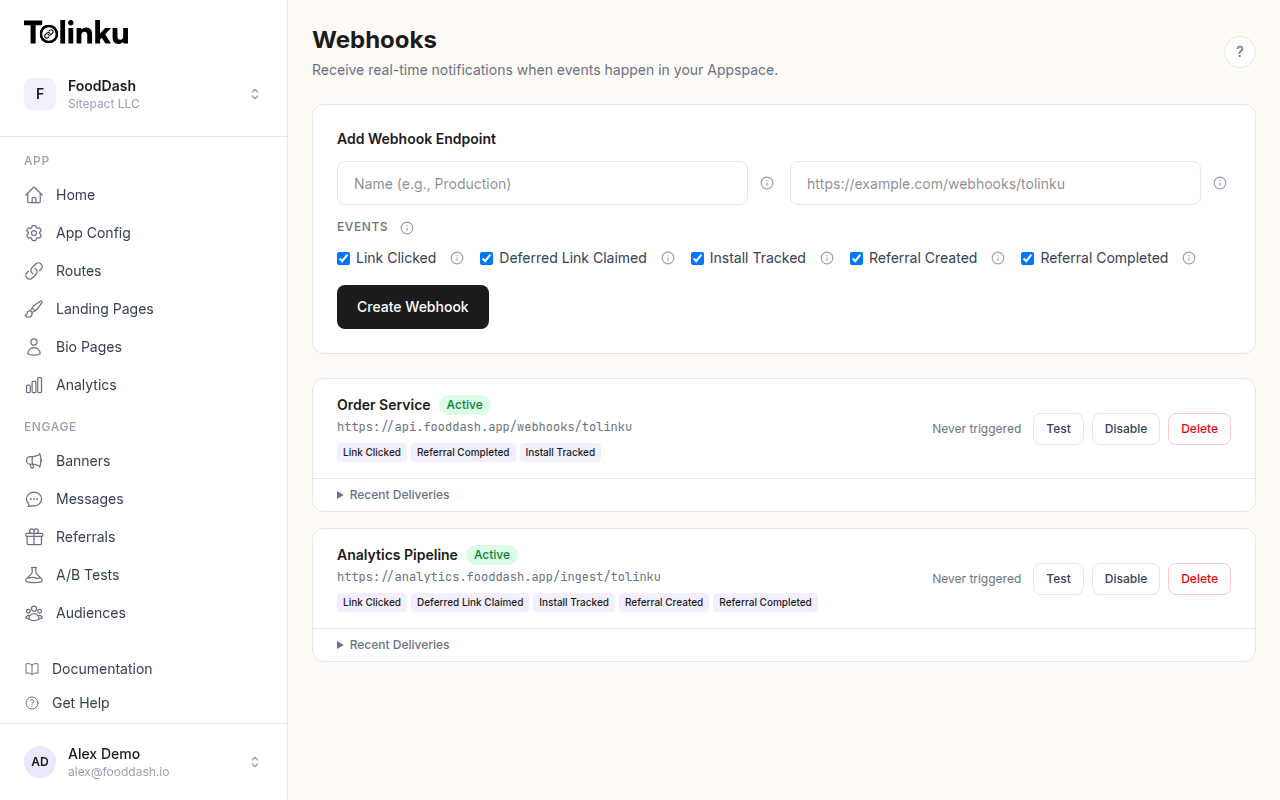 The webhooks page with create form, webhook list, and delivery log.
The Webhook Payload
Every Tolinku webhook delivers a JSON payload with this structure:
{
  "event": "link.clicked",
  "timestamp": "2026-05-20T14:32:08.441Z",
  "data": {
    "prefix": "go",
    "token": "summer-sale",
    "hostname": "links.example.com",
    "ip": "203.0.113.42",
    "platform": "ios",
    "device_type": "mobile",
    "campaign": "instagram-story-may"
  }
}
The five event types you can subscribe to are:
link.clicked: A deep link was tapped or clickeddeferred_link.claimed: A deferred deep link was resolved after app installinstall.tracked: An app install was attributed to a deep linkreferral.created: A new referral was registeredreferral.completed: A referred user completed the required action
Each event includes a data object with fields specific to the event type. The X-Webhook-Signature header contains an HMAC-SHA256 signature for verification, and the X-Webhook-Event header contains the event type string. See the webhook event types guide for full payload documentation.
Architecture: Webhook Receiver to Warehouse
The simplest pipeline has three components:
- Receiver: An HTTP endpoint that accepts webhook POST requests, verifies the signature, and acknowledges with a 200 response
- Buffer/Queue: A message queue (SQS, Pub/Sub, Kafka) that decouples ingestion from processing
- Loader: A worker that reads from the queue, transforms events, and writes them to your destination
Tolinku Webhook → Receiver (HTTP) → Queue (SQS/Pub/Sub) → Loader → Warehouse
You can skip the queue for low-volume setups (under a few thousand events per day) and write directly from the receiver. But for anything production-grade, the queue protects you from destination outages and rate limits.
Receiver: Verify and Enqueue
Here is a minimal Express receiver that verifies the webhook signature and pushes events to a queue. This pattern works for any downstream destination.
import express from 'express';
import crypto from 'crypto';

const app = express();
app.use('/webhooks', express.raw({ type: 'application/json' }));

const WEBHOOK_SECRET = process.env.WEBHOOK_SECRET!; // whsec_...

app.post('/webhooks/tolinku', (req, res) => {
  const signature = req.headers['x-webhook-signature'] as string;
  const expected = crypto
    .createHmac('sha256', WEBHOOK_SECRET)
    .update(req.body)
    .digest('hex');

  if (signature !== expected) {
    return res.status(401).send('Invalid signature');
  }

  // Respond immediately, then process asynchronously
  res.status(200).send('OK');

  const event = JSON.parse(req.body.toString());
  enqueue(event);
});

function enqueue(event: any) {
  // Implementation depends on your queue: SQS, Pub/Sub, Redis, etc.
  console.log(`Enqueued ${event.event} at ${event.timestamp}`);
}

app.listen(3000);
The key detail: use express.raw() so you receive the raw body for signature verification, then parse JSON after validation. See the webhook security guide for a detailed walkthrough of signature verification.
BigQuery Integration
BigQuery is a natural fit for deep link analytics because it handles append-heavy workloads well and integrates with most BI tools.
Table Schema
Create a table that accommodates all event types:
CREATE TABLE IF NOT EXISTS `your_project.deep_links.webhook_events` (
  event_type STRING NOT NULL,
  event_timestamp TIMESTAMP NOT NULL,
  received_at TIMESTAMP NOT NULL,
  prefix STRING,
  token STRING,
  hostname STRING,
  ip STRING,
  platform STRING,
  device_type STRING,
  campaign STRING,
  raw_data JSON
)
PARTITION BY DATE(event_timestamp)
CLUSTER BY event_type, platform;
Partitioning by date and clustering by event type and platform keeps query costs low when you filter on those columns, which you almost always will.
Streaming Insert
Use the BigQuery Storage Write API for real-time inserts. The older insertAll streaming API works too but has higher per-row costs.
import { BigQuery } from '@google-cloud/bigquery';

const bigquery = new BigQuery();
const dataset = bigquery.dataset('deep_links');
const table = dataset.table('webhook_events');

async function loadToBigQuery(event: any) {
  const row = {
    event_type: event.event,
    event_timestamp: event.timestamp,
    received_at: new Date().toISOString(),
    prefix: event.data.prefix || null,
    token: event.data.token || null,
    hostname: event.data.hostname || null,
    ip: event.data.ip || null,
    platform: event.data.platform || null,
    device_type: event.data.device_type || null,
    campaign: event.data.campaign || null,
    raw_data: JSON.stringify(event.data),
  };

  await table.insert([row]);
}
The raw_data JSON column stores the full event data object. This gives you a structured schema for the most common fields while preserving the complete payload for event types with different data shapes.
Batch Loading Alternative
For higher volumes, buffer events locally (or in Cloud Storage) and use a load job instead of streaming inserts. Load jobs are free (no per-row charge) and handle large volumes efficiently. The tradeoff is latency: load jobs take seconds to minutes, while streaming inserts are near-instant.
A practical pattern: stream events to a Cloud Storage bucket as newline-delimited JSON files (one file per minute), then run a scheduled load job every 5 minutes.
Snowflake Integration
Snowflake works best with a staging approach: land the raw JSON in a stage, then transform it with a COPY command or Snowpipe for continuous loading.
Table and Stage Setup
CREATE TABLE IF NOT EXISTS deep_links.webhook_events (
  event_type VARCHAR NOT NULL,
  event_timestamp TIMESTAMP_NTZ NOT NULL,
  received_at TIMESTAMP_NTZ DEFAULT CURRENT_TIMESTAMP(),
  payload VARIANT NOT NULL
);

CREATE STAGE IF NOT EXISTS deep_links.webhook_stage
  FILE_FORMAT = (TYPE = 'JSON');
The VARIANT column stores the entire webhook payload. You can extract structured fields with Snowflake's JSON path syntax: payload:data.platform::string.
Snowpipe for Continuous Loading
Snowpipe monitors a cloud storage location and automatically loads new files. Your webhook receiver writes JSON files to S3 or GCS, and Snowpipe picks them up within minutes.
CREATE PIPE IF NOT EXISTS deep_links.webhook_pipe
  AUTO_INGEST = TRUE
AS
  COPY INTO deep_links.webhook_events (event_type, event_timestamp, payload)
  FROM (
    SELECT
      $1:event::string,
      $1:timestamp::timestamp_ntz,
      $1
    FROM @deep_links.webhook_stage
  );
This approach decouples your receiver from Snowflake entirely. The receiver writes files; Snowpipe handles the rest.
Amplitude Integration
Amplitude expects events in a specific format through their HTTP V2 API.
async function sendToAmplitude(event: any) {
  const amplitudeEvent = {
    event_type: `deep_link.${event.event}`,
    time: new Date(event.timestamp).getTime(),
    platform: event.data.platform || 'unknown',
    event_properties: {
      prefix: event.data.prefix,
      token: event.data.token,
      hostname: event.data.hostname,
      campaign: event.data.campaign,
      device_type: event.data.device_type,
    },
    ip: event.data.ip,
  };

  await fetch('https://api2.amplitude.com/2/httpapi', {
    method: 'POST',
    headers: {
      'Content-Type': 'application/json',
    },
    body: JSON.stringify({
      api_key: process.env.AMPLITUDE_API_KEY,
      events: [amplitudeEvent],
    }),
  });
}
A few things to note:
- Event naming: Prefix with
deep_link.to distinguish webhook events from client-side events in Amplitude's event taxonomy. This makes it easy to filter and segment. - User identity: The webhook payload doesn't include a user ID (it fires on link click, before the user is necessarily identified). If you need to tie these events to a user, join on the referral code or token in a downstream analysis.
- Batching: The HTTP V2 API accepts up to 2,000 events per request. If you're processing a queue, batch events before sending.
Mixpanel Integration
Mixpanel's Import API accepts events in a similar structure.
async function sendToMixpanel(event: any) {
  const mixpanelEvent = {
    event: `Deep Link ${event.event.replace('.', ' ').replace(/\b\w/g, c => c.toUpperCase())}`,
    properties: {
      time: Math.floor(new Date(event.timestamp).getTime() / 1000),
      $insert_id: crypto.createHash('sha256')
        .update(JSON.stringify(event))
        .digest('hex')
        .substring(0, 36),
      prefix: event.data.prefix,
      token: event.data.token,
      hostname: event.data.hostname,
      platform: event.data.platform,
      device_type: event.data.device_type,
      campaign: event.data.campaign,
      ip: event.data.ip,
    },
  };

  await fetch('https://api.mixpanel.com/import?strict=1', {
    method: 'POST',
    headers: {
      'Content-Type': 'application/json',
      'Authorization': `Basic ${Buffer.from(`${process.env.MIXPANEL_PROJECT_TOKEN}:`).toString('base64')}`,
    },
    body: JSON.stringify([mixpanelEvent]),
  });
}
The $insert_id is critical for idempotency. If a webhook is retried and you send the same event twice, Mixpanel deduplicates based on $insert_id. We generate it as a hash of the full event payload since the Tolinku webhook payload doesn't include a delivery ID.
Handling Multiple Destinations
If you need to send events to more than one destination (say, BigQuery for long-term storage and Amplitude for product analytics), the queue pattern from earlier makes this straightforward. Each destination gets its own consumer.
async function processEvent(event: any) {
  const results = await Promise.allSettled([
    loadToBigQuery(event),
    sendToAmplitude(event),
  ]);

  for (const result of results) {
    if (result.status === 'rejected') {
      console.error('Destination failed:', result.reason);
      // Dead-letter queue or retry logic here
    }
  }
}
Use Promise.allSettled (not Promise.all) so one destination failing doesn't block the others. Failed deliveries go to a dead-letter queue for retry.
Handling Backfills and Replays
Webhooks are push-based: they deliver events as they happen. If your pipeline was down for an hour and missed events, you need a way to recover.
Tolinku's approach: Webhook deliveries are logged with status codes, response times, and attempt counts. Failed deliveries are retried automatically (3 retries at 1 minute, 5 minutes, and 30 minutes). Check the retry logic guide for details.
For longer outages, or if you need to reprocess historical data, use the Tolinku analytics API to query events directly and backfill your warehouse.
Schema Evolution
Your event schema will change over time as Tolinku adds new event types or new fields to existing events. Design your pipeline to handle this gracefully:
Store the raw payload. Always keep the original JSON alongside any structured columns. When a new field appears, it's already in your warehouse; you just need to add a column or update a view.
Use permissive schemas. BigQuery's JSON type and Snowflake's VARIANT type both handle new fields without schema changes. Only promote fields to dedicated columns when you query them frequently.
Version your transforms. If you extract fields in your loader code, version those transforms so you can update them without breaking existing data.
Monitoring the Pipeline
A pipeline you can't observe is a pipeline you can't trust. Track these metrics:
- Events received per minute: A sudden drop means either Tolinku stopped sending (check your webhook status in the dashboard) or your receiver is down.
- Queue depth: Growing depth means your loader can't keep up with ingestion. Scale the loader or investigate destination issues.
- End-to-end latency: Time from
event.timestampto the event appearing in your destination. For streaming inserts to BigQuery, this should be under 10 seconds. For Snowpipe, under 5 minutes. - Error rate by destination: Track failures per destination separately so you know which integration needs attention.
Choosing the Right Architecture
Volume Approach Latency Complexity < 1,000 events/day Direct insert from receiver < 1 second Low 1,000 – 100,000 events/day Queue + batch loader 1-5 minutes Medium > 100,000 events/day Queue + streaming loader < 10 seconds High For most teams starting out, the direct insert approach works fine. Add a queue when you need reliability guarantees or when you're sending to multiple destinations. Move to a streaming loader when latency matters and you have the engineering bandwidth to maintain it.
The receiver code stays the same regardless of architecture. You're only changing what happens after the event is acknowledged.
Ready to connect your deep link events to your analytics stack? Start by configuring webhooks in your Tolinku Appspace, then deploy a receiver using the patterns above.
Get deep linking tips in your inbox
One email per week. No spam.