Getting Started
Tolinku is a deep linking platform that handles Universal Links (iOS), App Links (Android), deferred deep linking, analytics, smart banners, and more. This guide walks you through setting up your account, configuring your app, and creating your first deep link.
What you will need
Section titled “What you will need”- A Tolinku account (sign up free)
- Your mobile app’s bundle ID (iOS) or package name (Android)
- A fallback URL for users who don’t have your app installed
Core concepts
Section titled “Core concepts”Before diving in, here are a few terms you will see throughout the docs:
- Account: Your billing entity. One account can hold multiple Appspaces.
- Appspace: An isolated environment for one app. Each Appspace has its own routes, analytics, domains, banners, and team settings.
- Route: A deep link path configuration. For example,
/product/:idmaps a URL to a specific screen in your app.
Your first link is already live
Section titled “Your first link is already live”Every Appspace comes with a built-in install link at /install on your domain. This link detects the visitor’s device and redirects them to the right place:
- iPhone/iPad: Redirects to your iOS App Store URL
- Android: Redirects to your Google Play Store URL
- Desktop: Redirects to your web fallback URL
- No store URL configured: Shows a branded landing page with download buttons
Once you add your store URLs in App Config, your install link works immediately. No route creation needed. Share https://your-app.tolinku.com/install and users land in the right store.
Quick setup
Section titled “Quick setup”-
Create your account
Sign up at app.tolinku.com. You will be prompted to create your first Appspace during onboarding.
-
Configure your app platforms
Open App Config in the sidebar and add your iOS Bundle ID, Android package name, and store URLs. This tells Tolinku how to route users to your app. Your
/installlink starts working as soon as store URLs are saved. -
Add a domain
Every Appspace gets a free
*.tolinku.comsubdomain. You can also add a custom domain likelinks.yourapp.comunder Domains in the sidebar. -
Create your first route
Go to Routes and create a new route. Set the path (e.g.
/invite/:code), choose a fallback URL, and you have a working deep link that opens directly inside your app. -
Test it
Open your link on a mobile device. If the app is installed, the user lands on the right screen. If not, they are redirected to the App Store, Play Store, or your fallback URL.
Dashboard overview
Section titled “Dashboard overview”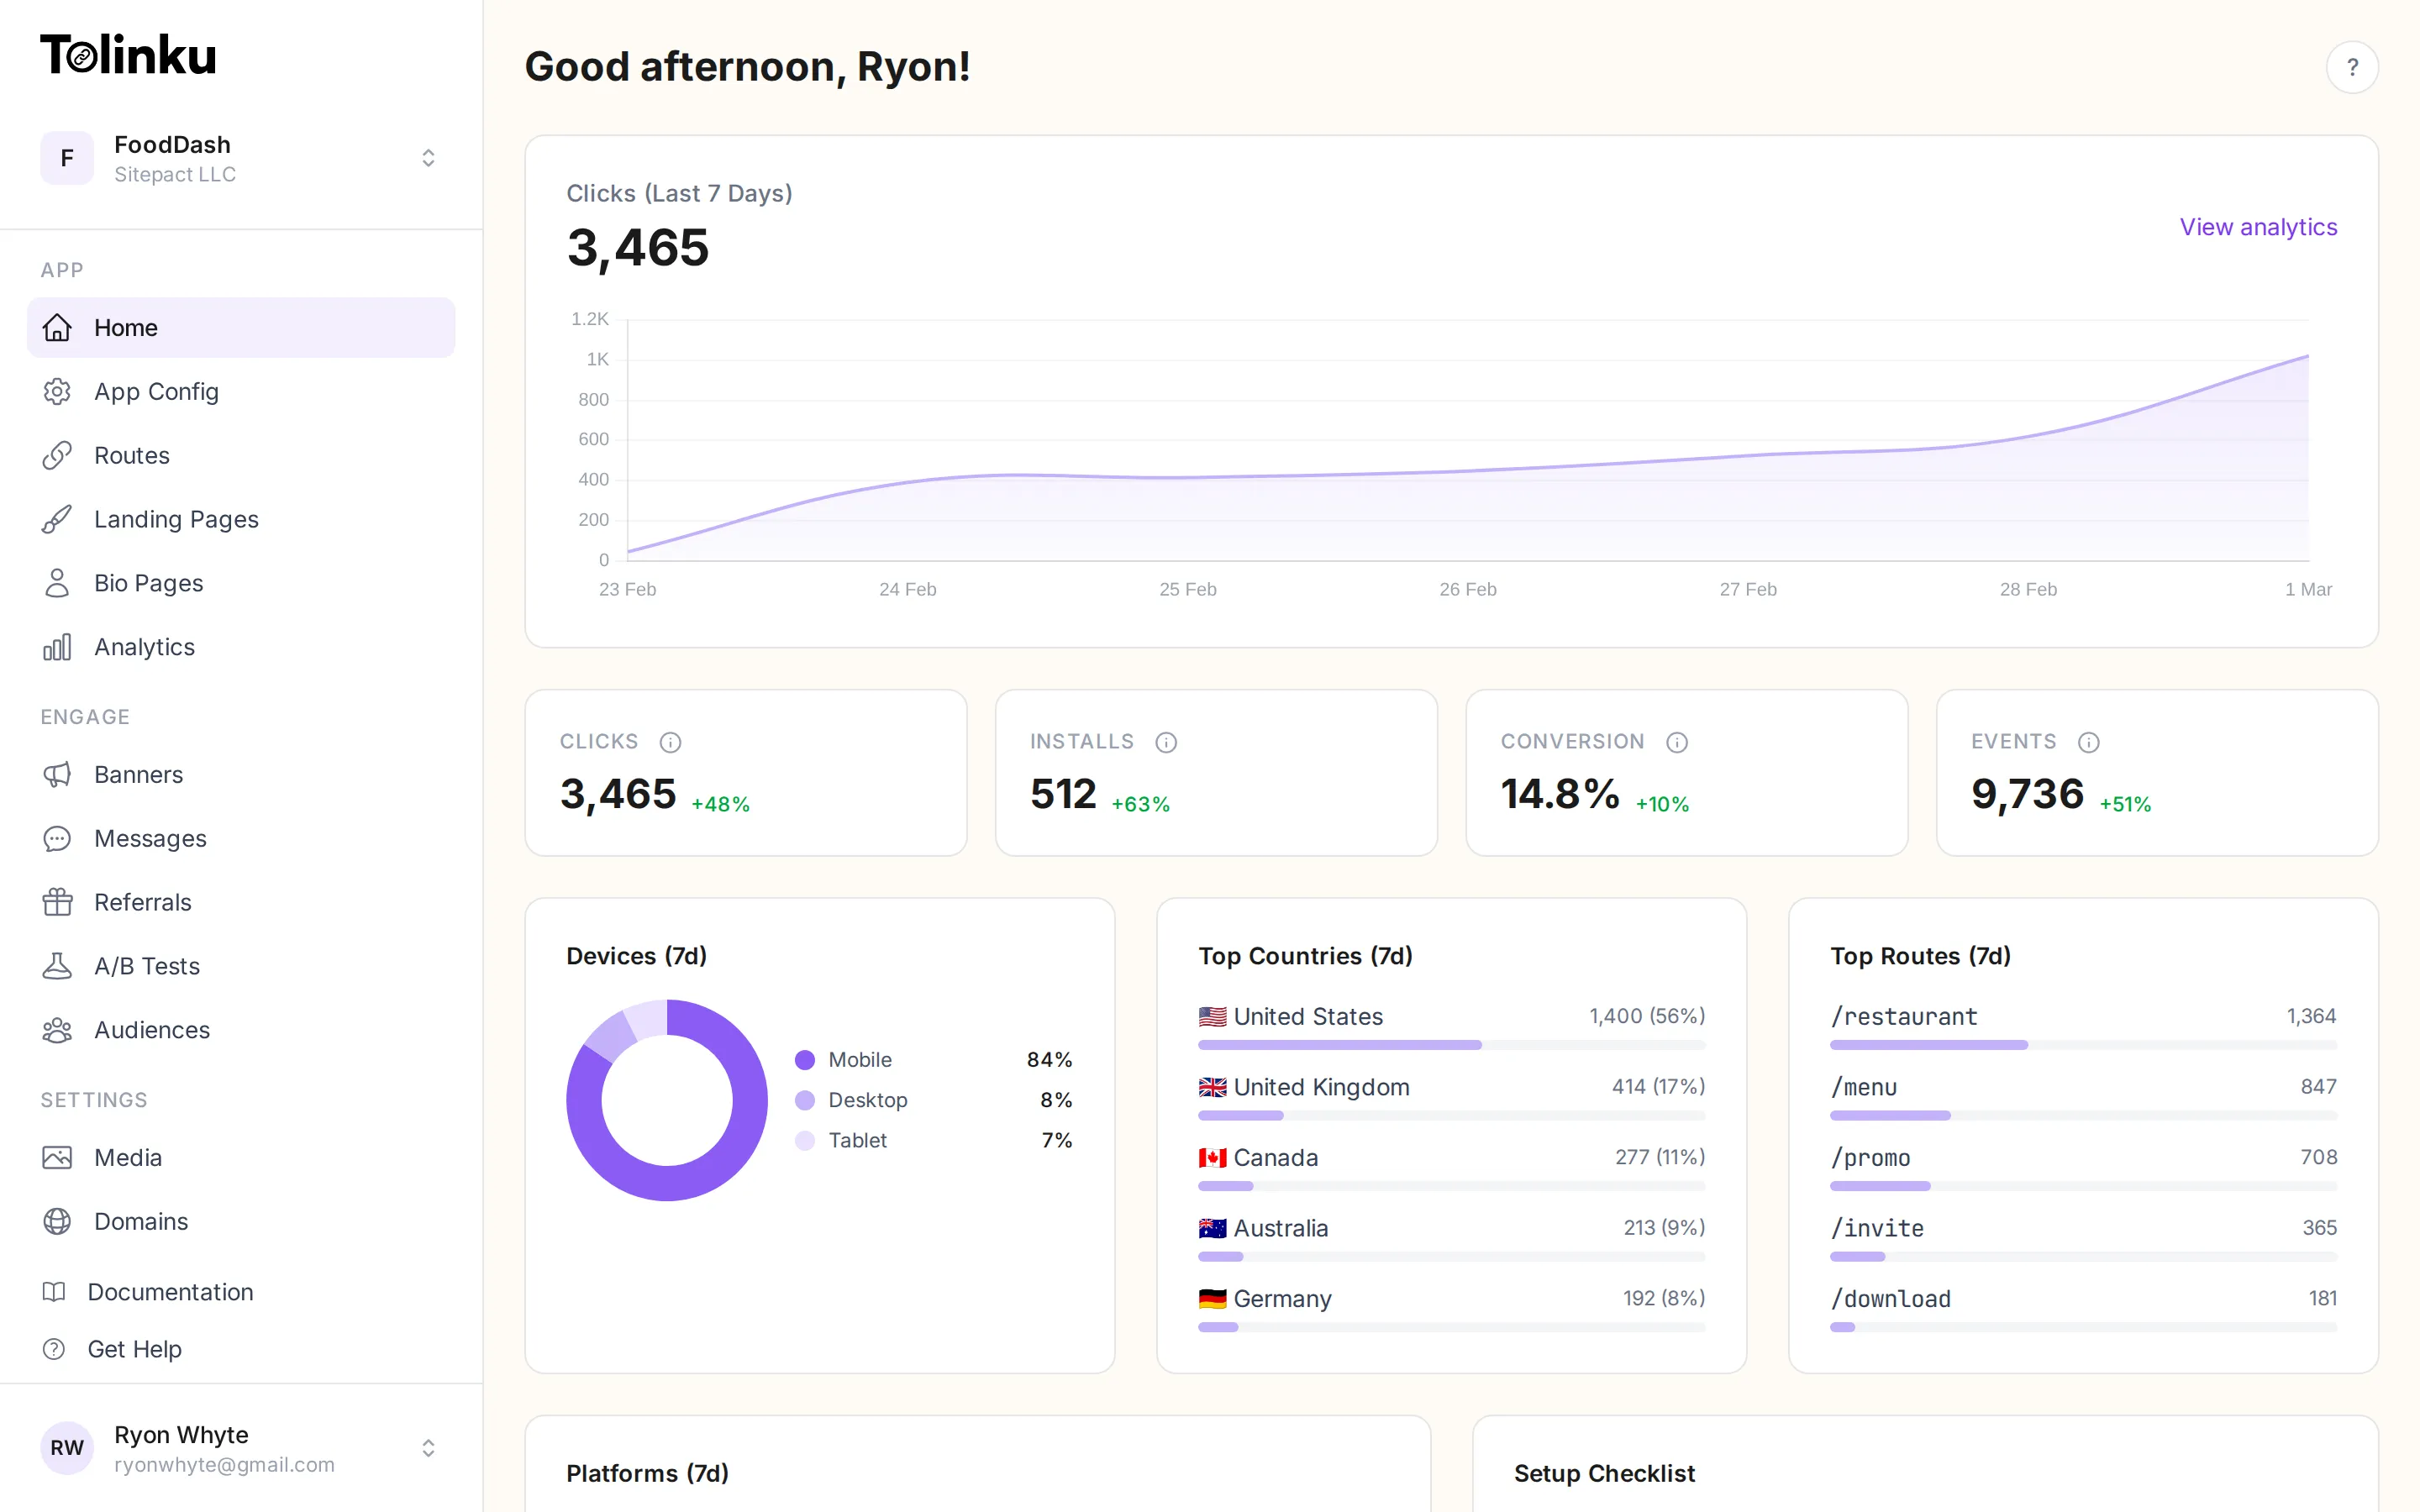
Once logged in, the dashboard shows key metrics for the last 7 days: total clicks, app installs, conversion rate, and custom events. Below that, you will see breakdowns by device type, top countries, and your most popular routes.
The sidebar organizes everything into three sections:
| Section | Pages |
|---|---|
| App | Home, App Config, Routes, Landing Pages, Bio Pages, Analytics |
| Engage | Banners, Messages, Referrals, A/B Tests, Audiences |
| Settings | Media, Domains, Documentation, Get Help |
The Setup Checklist on the dashboard tracks your initial configuration progress. It will prompt you to configure iOS/Android settings, add a custom domain, and create your first route.
Free tier
Section titled “Free tier”Tolinku includes a generous free tier so you can get started without a credit card:
- 1 Appspace
- 5 routes
- 1,200 clicks per month
- 7-day analytics retention
- 1 banner, 1 in-app message, 1 bio page, 1 webhook
When you are ready for more, paid plans start at $39/month per Appspace with a 30-day free trial.